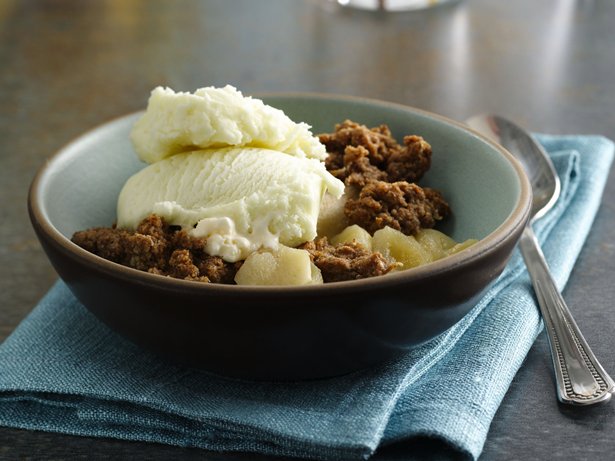
Did you go a little overboard this apple-picking season? Do you have too many apples than you know what to do with? Well the answer to your problems is closer than you think! An easy way to use up extra apples without having to waste them is bake something! There are many fall apple recipes – classic and new – that you can try in order to get rid of those pesky last apples that you do not want to have to waste. For instance, I tried out a classic apple crisp recipe that is easy, yet delicious.
With the same great taste of apple pie, this tasty treat puts a fun spin on a classic dish. Additionally, this dessert is simple enough for first-time bakers and will satisfy virtually anybody. When it comes to beginning the recipe, it is always a good idea to start with the main ingredient: the apples. For a recipe like this, freshly picked apples are always the best choice, so if you have gone apple picking this season, you are in luck! Also, a great aspect of this recipe is the fact that there are only a few other ingredients needed. In addition to apples, you will only need the following: brown sugar, flour, oats, butter or margarine, ground cinnamon, and nutmeg.
Once you have gathered all the ingredients, you are ready to get started! First, you must preheat your oven to 375˚. Next, get out an 8-inch square pan and grease it. Most recipes call for the pans to be greased with shortening, but I used normal cooking spray that you most likely have around the house and it worked just as well.
Now that you have done everything needed to prepare, you are one step closer to your apple crisp and can start the process. Start by washing about 3 medium sized apples because you are going to need 4 cups of apples, and I found that 3/4 of an apple was equivalent to 1 cup. Then, cut your apples into vertical slices (about 12 slices per apple works best). When slicing your apples, be sure to cut out the whole core for you do not want to be eating that later when you are trying to enjoy your dessert. Next, take your apple slices and spread them on the bottom of your greased-pan (believe it or not, you are already half way done with the recipe.)
The final thing to do is mix the remaining ingredients into a medium-sized bowl. Take 3/4 cup of brown sugar, 1/2 cup flour, 1/2 cup oats, 1/3 cup of butter or margarine, 3/4 teaspoon of cinnamon, and 3/4 cup of nutmeg and put all of this into the bowl. Now, you need to mix these ingredients together, but this is somewhat difficult because it is all dry ingredients and butter. Because the butter causes the mixture to clump, I found it easiest to do this with a fork. This way, you can mix the ingredients together and the holes in the fork cause less of the butter to stick to the fork. Even though you may not think it is done, you will know all the ingredients are mixed when the mixture looks crumbly (trust me, this is what it is supposed to look like). After everything is mixed, all you have left to do is sprinkle the mixture in the bowl over your apples in the pan. Do this step slowly because if you go too fast, you will end up dumping too much on a small section of the apples and you do not want only some of your apples to actually have the crisp. So, make sure you sprinkle the dry mixture on the apples slowly and evenly.
Now, place the pan of your unbaked apple crisp in your oven. You will need to bake it for 30 minutes; however, because every oven is different, you should check it after 25 minutes and then if it is not done put it back in and check it after every 5 minutes to see if it is done. Also, you should use a timer for this step because if you are anything like me, you will certainly forget about your dessert without a timer. So, set your timer for about 25 minutes.
When your timer goes off, check your dessert’s status by putting a tooth-pick through a few of the apples. If the apples are still hard, then it is definitely now done; but, if the tooth-pick goes through the apples easily, then it is most likely done. However, make sure you also take into account the look of the apples. If everything looks like what it did when you put it in, it is probably not done; you want your apple crisp to be golden brown. So, if everything looks and feels right, you can go ahead and take your crisp out of the oven.
One last helpful tip that you may want to use is if you like your food crispy and maybe even a little burnt, try broiling the dessert. After it is done cooking, place the apple crisp in the over and turn it to broil. Make sure you only leave it in for about 30 seconds to 1 minute, or else your apple crisp will be far too burnt. But if left in for the perfect amount of time, this step will add the perfect amount of crisp to your apples.
Lastly, do not forget to top your dessert with vanilla ice cream – the perfect addition to an already perfect treat.


